

 Engine
What you can do
Build: Open a pull request
Apply the proposed fix by opening a pull request in your connected repository.
Test: Add offline examples to a dataset
Generate custom ground truth dataset examples from production traces for offline evaluation.
Monitor: Create an online evaluator
Deploy a custom evaluator to catch regressions in future traces.
Set up LangSmith Engine
Setting up LangSmith Engine is a two-step process: an Organization Admin first enables Engine for the workspace, then any user can configure Engine for each tracing project.Enable Engine for your organization
You must be an Organization Admin to enable Engine. To find your admins, open Settings, select Members under Access and Security, and look for members with the Organization Admin role.
1
Open Engine enablement
In the LangSmith console, click Settings in the bottom-left corner, then select Engine enablement under Engine.
2
Toggle Enable Engine
Toggle Enable Engine on and acknowledge the AI features terms of use:
LangSmith AI features, powered by LangChain-managed inference, bring intelligence to your observability workflow. With LangSmith AI enabled, your team can surface issues faster, run smarter evaluations, and build more reliable LLM applications. By enabling this feature, your organization’s trace data will be processed using LangChain-managed LLM keys. Subject to our Terms of Service.
Understand LCU costs
Engine charges in LangChain Compute Units (LCUs), a normalized unit of work combining compute, storage, memory, and LLM spend. The more traces, deep thought, and work needed, the more LCUs Engine consumes. LCUs cost $1.50 USD each. Engine runs in two phases:
Actual usage varies based on trace volume and complexity.
On initialization, Engine audits past traces, clusters and prioritizes issues by severity, and proposes fixes to your prompts or code (if a repository is connected). Recurring scans surface new improvements not previously found.
Set spend limits and monitor usage
Organization Admins can set spend limits at two levels:- Org-wide limit: Open Settings, select Engine enablement under Engine, then enter a value under Monthly LCU spend limit.
- Per-project limit: Open the Engine tab in a tracing project, click the Engine settings gear icon, and set a limit under Monthly LCU spend limit.
Set up Engine for a tracing project
1
Open the Engine tab
In the LangSmith console, navigate to Tracing in the UI sidebar, select a project, then click the Engine tab in the project navigation.
2
Connect a code repository (optional)
Although optional, connecting a code repository is recommended. Engine uses your source code to diagnose problems, generate higher-quality fixes, and open pull requests directly from issues. Under Connect your agent’s code repository, select a repository in the GitHub Repository field. Only repositories the GitHub app can access are shown. Click Manage app access → to update permissions. To give Engine additional project context, select a repository in the Context Hub repository field. You can update either repository at any time from Engine settings.
3
Select priority categories (optional)
Under What matters most to you?, select categories to prioritize for your review (for example, Tool Call Failures or Latency). Click + Add something specific to describe a custom concern. You can update Priorities at any time from the Engine settings.
4
Focus on specific traces (optional)
Under Focus on specific traces, narrow Engine’s attention to a subset of runs by run name or metadata. Leave it empty to analyze all traces. You can update the scope at any time from the Engine settings. For more information, see Focus on specific traces.
5
Start analyzing
Click Start Analyzing. The dialog may show an estimated monthly cost range based on your project’s usage. Engine can take up to 20 minutes to analyze your project’s traces and begin making suggestions. While you wait, you can set up notifications in the settings panel to be alerted in Slack or via webhook when issues of different priority levels are found.
6
Review the agent overview document
Before surfacing issues, Engine generates an agent overview document describing your project’s purpose, architecture, and key metrics based on your traces. Review and edit the document, then click Accept & Continue to proceed. If the overview is inaccurate, edit it before continuing, since LangSmith Engine uses it as context for all analysis, so accuracy here affects the quality of detected issues. You can update it at any time from Engine settings.
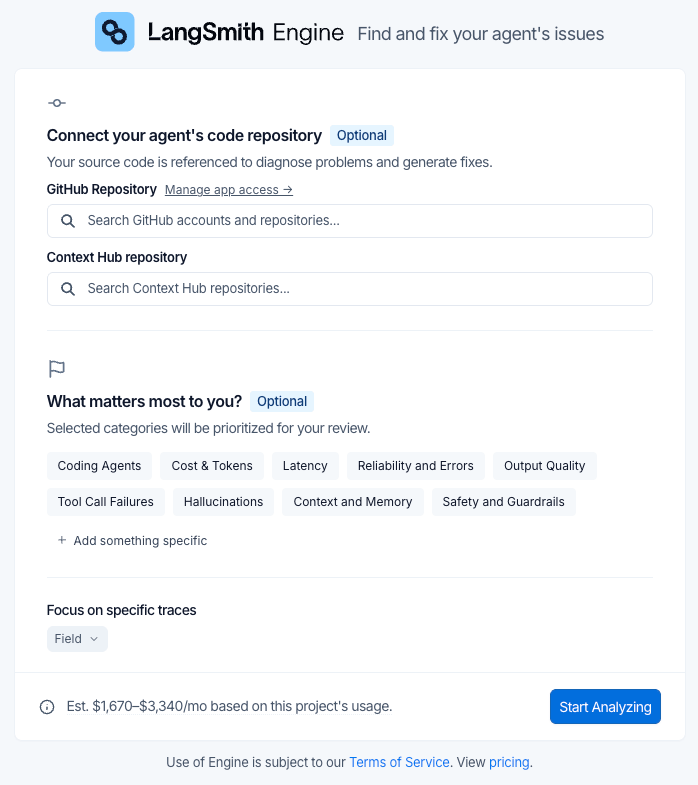
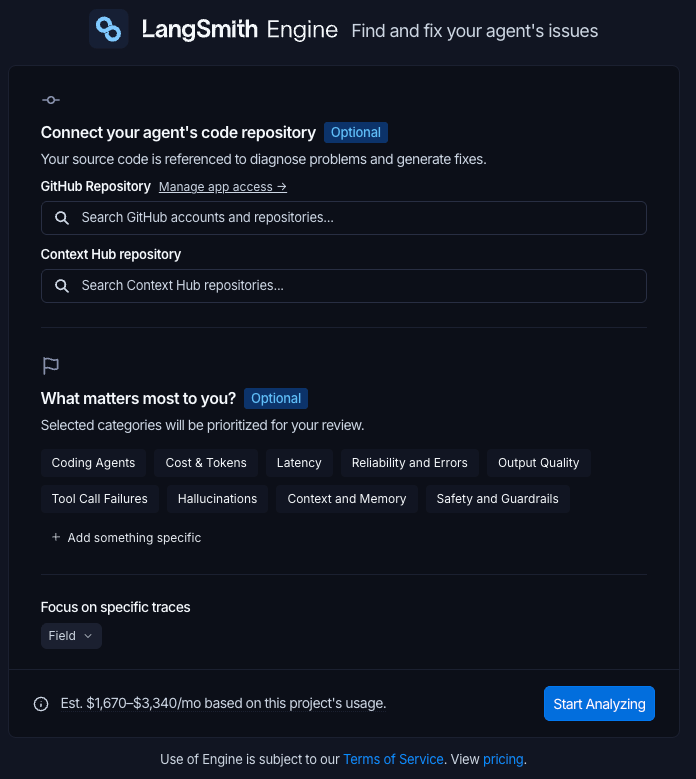
Setup dialog
Focus on specific traces
Focus Engine on the traces that matter to keep analysis precise and reduce wasted LCU spend. Use trace scope (the Focus on specific traces control) when a project mixes several agents or workloads and you want Engine to analyze only some of them. For example, if a project runs both a production chatbot and a nightly batch job, scope toRun Name is chatbot so Engine ignores the batch runs. By default, Engine analyzes all of a project’s traces.
Set the scope in either of two places, using the same control:
- Engine setup: In the Find and fix your agent’s issues panel, under Focus on specific traces.
- Engine settings: In the Focus on specific traces section of the Engine settings panel. Edits here save automatically.
- Run Name: Pick a run or agent name. The value field autocompletes from the run names in your project’s recent traces.
- Metadata: Pick a metadata key, then a value. Both autocomplete from the metadata present on your project’s recent runs.
Run Name is chatbot or env is prod. Click the × on a chip to remove that condition.
Scope determines which traces Engine analyzes to detect issues and build the agent overview document. Scope set during initial setup applies to Engine’s first scan. Scope changed later in Engine settings does not re-run Engine immediately; it applies on the next scan, which runs every 6 hours.
Browse and filter issues
Once setup is complete, the Engine tab displays a list of automatically detected issues in the left panel. Each entry shows a title, a short description, the number of contributing traces, and how recently the issue was observed. At the top of the list, you can click:- Filter issues icon to filter by Priority, Status and Tags.
- Sort issues icon to sort by Severity, Last Updated, and Created.
- Engine settings gear icon to configure LangSmith Engine.
Review an issue
Click any issue in the list to open its detail panel. At the top, a diagnosis describes the problem and its impact. The Linked traces section lists the traces that support the diagnosis. Click any trace to open its detail panel. For more information, see Manage a trace. Click Add offline examples at the bottom right of this section to generate custom ground truth dataset examples from the production trace inputs for offline evaluation. The Proposed Fix section describes the issue and suggests how to address it, which may include specific code or prompt changes if a repository is connected. The Suggested Evaluator section provides a ready-to-use evaluator you can deploy to catch the issue in future traces. If the evaluator fires after you close an issue, the issue is automatically reopened to indicate the problem persists. The Offline Examples section proposes dataset examples generated from the production trace inputs that triggered the issue, for use in offline evaluation.Take action on an issue
Change priority
Select Low, Medium or High from the priority dropdown to update an issue’s priority. You can optionally provide a reason, which feeds back into LangSmith Engine to help improve its analysis over time.Create an evaluator
- Click Create Evaluator to deploy the suggested evaluator for the issue.
- Configure the name, run filters, and sampling rate. Edit the code directly in the built-in editor if needed.
- Enable Apply to past runs to see how many historical traces the evaluator would have flagged before deploying.
Add offline examples
- Click Add offline examples at the bottom of the Linked traces list to open the Add as offline example dialog.
- Review each trace. The dialog shows the input, the wrong output the agent produced, and the proposed expected output as a custom ground truth example.
- Click Add to Dataset to add them directly, or click Edit in annotation queue to review them first.
- In the annotation queue, each example shows the run inputs alongside reference outputs proposed by LangSmith Engine, structured as named assertions generated from trace analysis. Each assertion is a short claim describing what a correct answer should or shouldn’t include. Edit the assertions as needed, add new ones with + Add assertion, then click Add to Dataset & Continue to work through each example.
Copy the issue prompt
Click the Copy Fix Context copy icon to save a prompt with the issue details to your clipboard. You can then use it with an LLM or coding assistant to help resolve the issue.Open a pull request
Click Open PR to open a GitHub pull request in your connected repository with the proposed fix applied. Once a pull request is open, the button changes to View PR. LangSmith Engine can propose code changes to any connected repository, including agents built with Deep Agents, LangChain, and LangGraph.Resolve or ignore an issue
Click Resolve to mark an issue as fixed, or Ignore to dismiss it as not real or not worth fixing. You can optionally provide a reason for either action.Reopen an issue
To reopen a previously closed issue, open the issue detail view and click Reopen.List issues via the CLI
You can list issues programmatically using the LangSmith CLI.Get notified about new issues
LangSmith Engine can notify you when it opens a new issue, links a new trace to an existing issue, or fails to complete a run. Deliver these notifications to a Slack channel, an HTTP webhook endpoint, or both. Each destination has its own event types and minimum priority level, so you can route urgent issues to a paging webhook while sending every issue to a Slack channel. Manage notification destinations from the Engine Settings panel: open the Engine tab for a tracing project, click the Engine settings gear icon, and under Notifications click + Add destination.Notify a Slack channel
1
Connect a Slack workspace
Connecting a Slack workspace is an organization-level action you perform once, not per project. Connecting or disconnecting a workspace requires the
organization:manage permission. In the LangSmith console, open Settings, go to your organization’s General settings, and under Slack click Connect Slack. Authorize the LangSmith app in Slack. You can connect more than one Slack workspace to an organization.2
Add a Slack destination
On the Engine tab of a tracing project, click the Engine settings gear icon, then click Add destination. Set the Deliver to field to Slack, then choose the workspace and channel under Channel.
3
Choose events and priority
Under Notify when, select which event types post a message to the channel. Under Minimum priority, choose the lowest severity that triggers a notification. Click Add destination to save.
Send to a webhook
To forward Engine events to your own incident-management, paging, or chat tooling, add a destination and set the Deliver to field to Webhook. Enter a URL and, optionally, custom headers. Webhook deliveries are signed so you can verify their authenticity. For the full event payload reference, signing-secret verification, and delivery semantics, see Engine webhook events.Configure LangSmith Engine
LangSmith Engine uses LangChain-managed inference exclusively. Bring Your Own Key (BYOK) is not supported; you cannot supply your own provider API keys for Engine.
- Agent overview: Edit your agent overview document to keep Engine’s understanding of your project accurate as your application evolves.
- Preferences: Areas Engine should focus on, prioritize, or ignore. Engine treats these as authoritative and folds them into the agent overview document on the next scan. Select category chips such as Cost & Tokens, Latency, or Tool Call Failures, or click + Add something specific to describe a custom concern. Changes take effect on the next scan.
- Engine spend: View the month-to-date Engine LCU spend for this project. Click Set limit to cap monthly spend. New runs pause when the monthly limit is reached.
- Focus on specific traces: Narrow Engine’s attention to a subset of runs by run name or metadata. Edits save automatically and take effect on the next scan. See Focus on specific traces.
- Notifications: Click Add destination to add a Slack channel or webhook destination that receives a notification when Engine detects a new issue. Set a minimum priority level per destination to control which issues trigger a notification. See Get notified about new issues.
- Code repository: Connect or update a GitHub repository so the agent can reference source code when diagnosing issues. Optionally set a Subfolder and a Branch (defaults to the repository default).
- Context repository: Connect a Context Hub repository so Engine can propose fixes to instructions, docs, and linked skills.
- Pause: Engine scans your traces every 6 hours by default. Click Pause to stop scanning without deleting the existing issues, or Resume to resume scanning.
- Delete all issues: This action cannot be undone. All issues and settings will be permanently removed.
Connect these docs to Claude, VSCode, and more via MCP for real-time answers.